Update 9th October, 2015
John has decided to remove the Amazon Image discussed in this post because of Oracle licensing concerns. This post remains for reference and may still be of use with respect to opening an AWS account etc., but without the AMI it is not possible to follow the full process to set up an EPM 11.1.2.4 environment.
Busman’s Holiday
I haven’t posted to this blog for six weeks or so, because most of my free time has been taken up with a slightly different Essbase project: I’ve been writing a chapter (and co-writing another) for volume two of ‘Developing Essbase Applications’. It has been a great, if intense, experience and the book is shaping up to be a worthy successor to the first volume with a combination of new and returning authors. The print version will be available later this year. Follow a Twitter search on the hashtag #DevelopingEssbase or check back here for more updates!
11.1.2.4 is Here
Oracle EPM 11.1.2.4 appeared for download on OTN earlier this week. The arrival of a new EPM version is always exciting, with a flurry of social media activity as people install and test it (my initial observations were posted on the Qubix blog). The testing is the fun part, but the prospect of a from-scratch install never fills me with joy. Fortunately for me John A. Booth has already done the hard work, and released a Metavero AMI (Amazon Machine Image – essentially, a virtual machine snapshot from which any number of identical instances can be spun up on Amazon Web Services). Thanks John! In this post I’m going to explain how to make use of the AMI.
John’s blog post documenting the image is here. I strongly recommend reading this post before going any further. However, John assumes that you’re reasonably familiar with Amazon Web Services (AWS). In brief, AWS gives you the ability to create virtual servers in the cloud of (almost) any conceivable specification, and with Amazon taking care of Operating System licensing considerations; you then remote in to them or even connect via HTTP just as you can with an on-premise server. This means that you can spin up an EPM 11.1.2.4 server and start learning (remember that this AMI is strictly not for production use) without paying up front for server hardware and an expensive Windows Server license.
Cameron Lackpour wrote a blog post explaining how to use John’s original 11.1.2.1 image back in 2011, but a) the AWS interface has changed a little since then, and b) the helpful images in Cameron’s post seem to have disappeared. The following guide will take you through the process required to get your own 11.1.2.4 instance up and running, with (hopefully) a lot less trouble and time than performing the downloads, installations, and configuration yourself.
Caveat Emptor
Buyer beware — and you will have to do some buying. AWS is not a free service, or at least, not for the level of resources you will be needing. Consequently, you must do your due diligence regarding the pricing structure and be willing / able to pay the bills. There is an introduction to AWS here, and an introduction to how AWS pricing works here. In very general terms, Amazon charge for three things:
- Server resources while an instance is running (this is the Amazon EC2 component). Be warned that if you leave an instance running, the bill continues to accumulate whether you are connected or not. Forget it for weeks or months and that’s a lot of hours and a lot of money.
- Associated storage resources (volumes), even if the instance is not running. It is possible to leave the volume available and accumulating charges even if the instance is deleted.
- Data transfer in and out.
In my case, this instance costs me less than USD1 per hour for running the server, and around USD40 per month for the storage regardless of whether I run the image for one hour, 30 days, or not at all. My data transfer fees are negligible in comparison. However, you need to be cognizant of the pricing structure associated with your particular account (I don’t know all the promotional or regional variations), monitor the charges carefully and take action to avoid leaving resources in use when not necessary. Amazon does at least provide some help, with alerts that can be configured to email you when your spend hits a predefined limit.
You may think that I’m harping on this point, but — while AWS provides (in my opinion) very reasonable pricing for a quick kick of the 11.1.2.4 tires — I really don’t want to receive any emails from angry people who followed this guide and then got an unexpected bill. Be careful.
Sign Up for AWS
With those warnings / disclaimers out of the way, the first task is to sign up for an AWS account. If you already have an account or access to one, skip ahead to the AMI Step by Step section. First, navigate to aws.amazon.com:
Click the big yellow button for ‘Create a Free Account’.
Select the ‘I am a new user’ option (I do have an Amazon.com account but used a new email address for the purposes of this post – it may be possible to sign up for AWS with an existing Amazon.com account, should you have one). Click on the ‘Sign in…’ button.
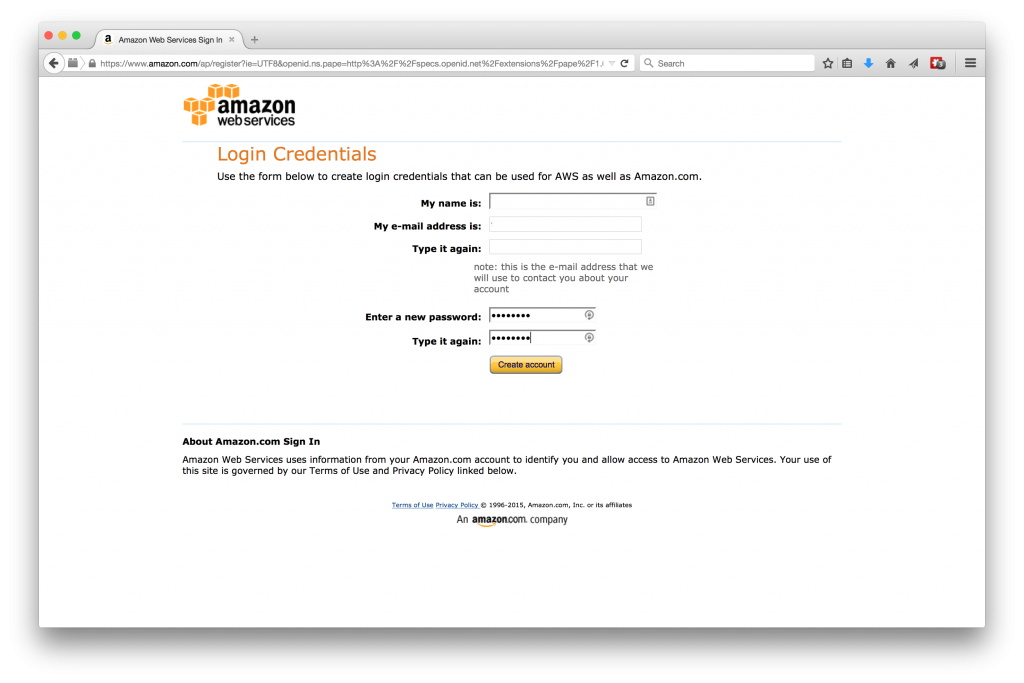
Enter your name, details and a suitably secure password then click ‘Create account’. This will take you to a ‘Contact Information’ page. I won’t show this page, as entering your address is self-explanatory. Read and agree to the AWS Customer Agreement after running it past your attorney. Enter the Captcha, and click ‘Create Account and Continue’.
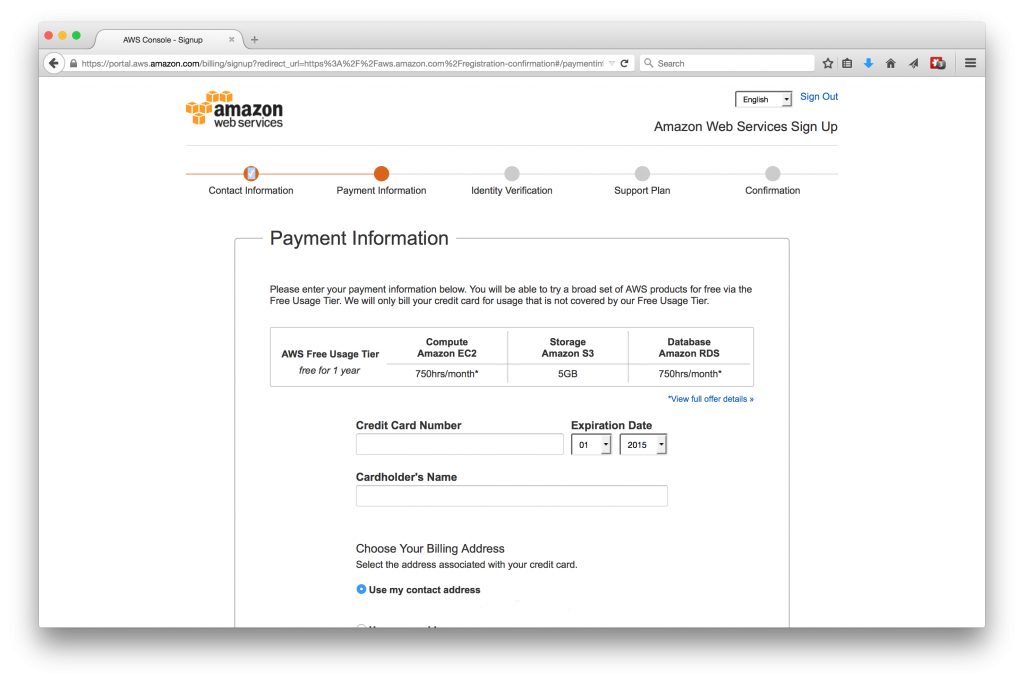
Notice that you’re being asked for payment information, despite having followed the link for a free account. Sadly, Amazon’s ‘Free Usage Tier’ specifications are not sufficient to run an EPM virtual server. Sign your life away by entering your credit card details, then click ‘Continue’.
Enter your country code and phone number. Then click ‘Call Me Now’. Amazon will robocall you and prompt you to enter a PIN displayed on the screen. Do what the nice lady tells you, then click ‘Continue to select your support plan’.
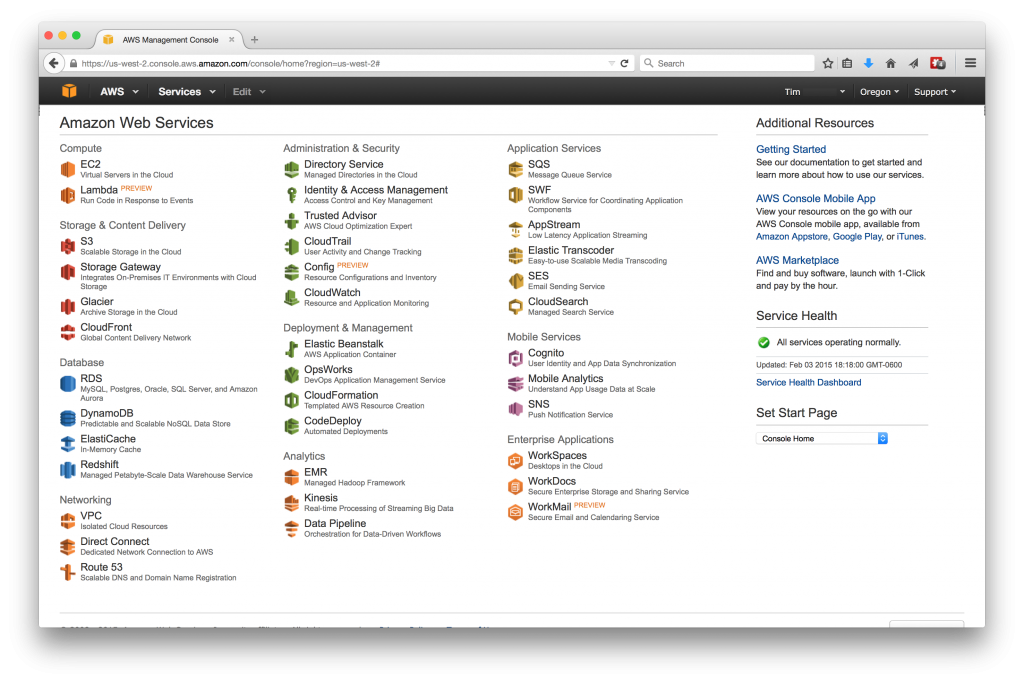
I’ll assume anyone following this tutorial because they want to test drive the EPM stack will want the free support option. Make sure to select it, then click ‘Continue’. If all is well, you will be taken to a ‘Welcome to Amazon Web Services’ page. Click on ‘AWS Management Console’ under the ‘My Account’ dropdown.
Success! Note that my ‘Region’ is shown in the top-right corner as Oregon (‘US West’). I think this was a quirk of the hotel internet provider I was using when I produced the screenshot, as I was sitting ~2000 miles from Oregon. This is relevant, however, because John’s AMI is associated with the ‘US East’ region, and searching for later it will fail unless that’s your region too. If it doesn’t already say ‘N. Virginia’, choose ‘US East’ in the region dropdown (after which the screen will show ‘N. Virginia’ instead of ‘Oregon’). This would also be a good time to follow the link for ‘Billing and Cost Management’ in the dropdown under your username, set up some billing alerts, and familiarize yourself with keeping track of your AWS spending.
AMI Step-By-Step
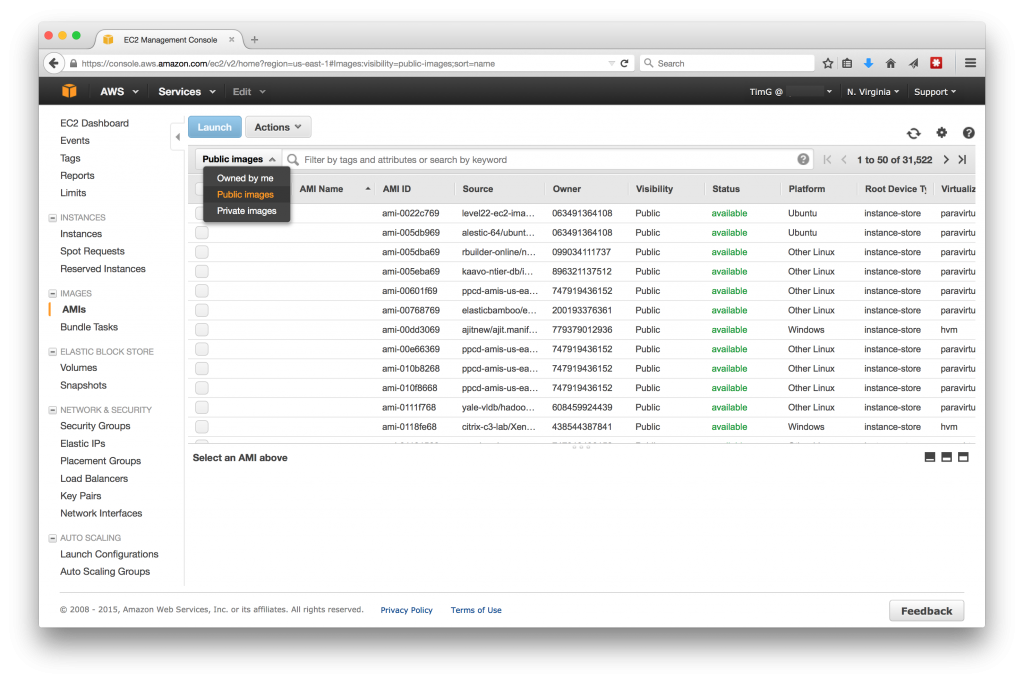
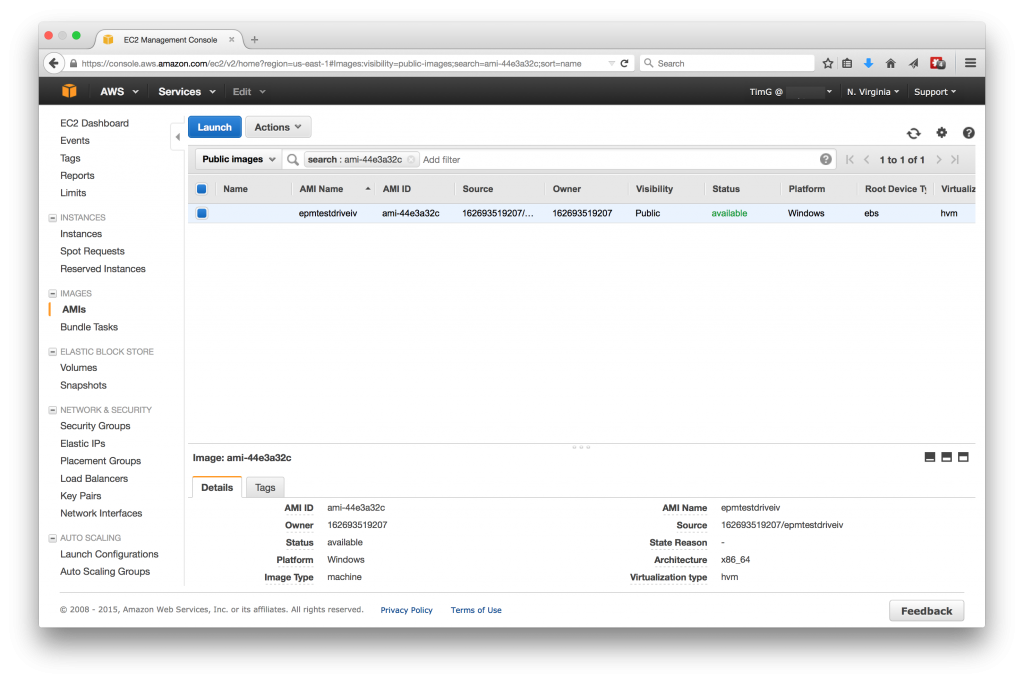
Select ‘AMIs’ under the Images menu in the sidebar.
Enter ‘ami-44e3a32c’ in the search box and hit return, which should display just one ‘epmtestdriveiv’ AMI. Please be aware that John has revised the AMI several times, and the AMI ID can change – refer back to the latest revision of his Metavero blog post to ensure you have the latest one. Right-click on the AMI and click ‘Launch’.
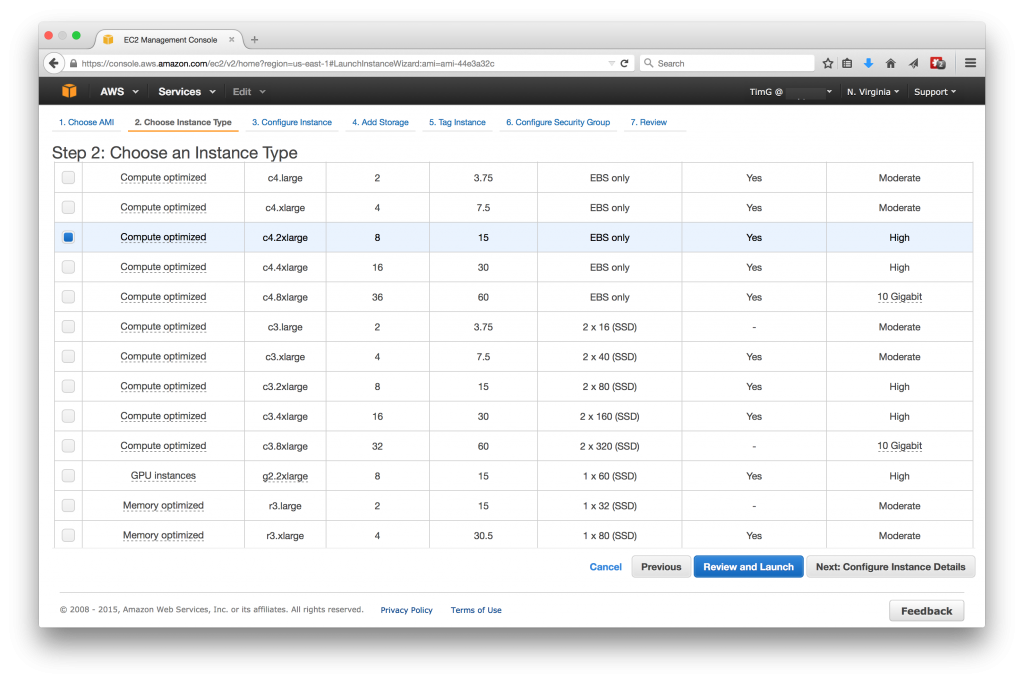
The ‘Choose an Instance Type’ page opens. Different instance types have different levels of processor, network and storage resources and incur different charges. I have selected the c4.2xlarge type in line with John’s recommendation at the time of writing (but again, check the latest revision at Metavero.com). Then click ‘Next: Configure Instance Details’.
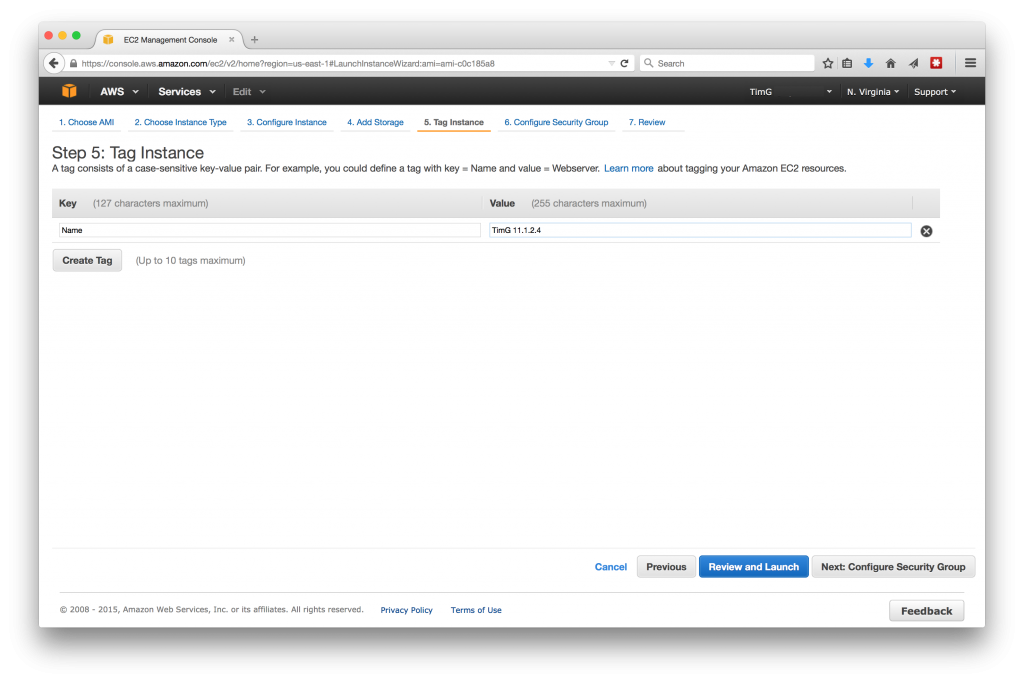
On the ‘Tag Instance’ page I’ve picked ‘Name’ as the key and named the instance. This is a corporate account and we have dozens of instances, so I picked a name that will hopefully prevent an administrator from deleting it without talking to me first. Then click ‘Next: Configure Security Group’.
Amazon have made it really easy to create a new security group at this stage, rather than having to do it as a separate initial step (Cameron’s 2011 instructions followed that process). I configured a security group to allow RDP (the default) over also TCP (the default) on port 3389 (the default). I can even select ‘My IP’ rather than having to make sure I know it first. Now only an RDP connection from my home IP can be used to access this image; good for security, but bear in mind that if your IP address changes or you want to access from multiple locations you may have to update the security group. Once the group is defined, click on ‘Review and Launch’.
Notice the big warning that Amazon doesn’t just give this stuff away. Click ‘Launch’ to continue.
Now you will be prompted for a ‘key pair’. I have existing Amazon key pairs so I selected an existing key (after making sure I did indeed have the key file – I hadn’t used it for a while). You may need to select the option to create one and save the resulting private key file (.pem) in a safe location. Check the box to agree that if you select a key to which you don’t actually have access, you could potentially get yourself locked out. At this point, you can click the ‘Launch Instances’ button, which will initialize the instance.
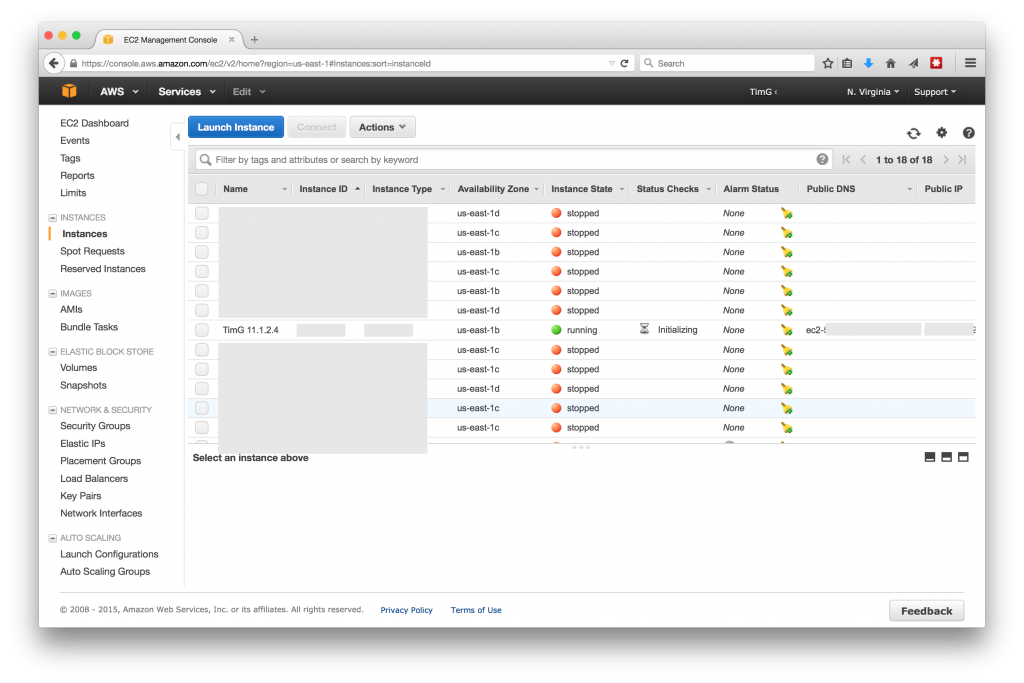
The launch confirmation screen appears. Click ‘View Instances’ to be returned to the Instances page in the EC2 Dashboard.
The new instance has state ‘Initializing’. This can take a little while the first time.
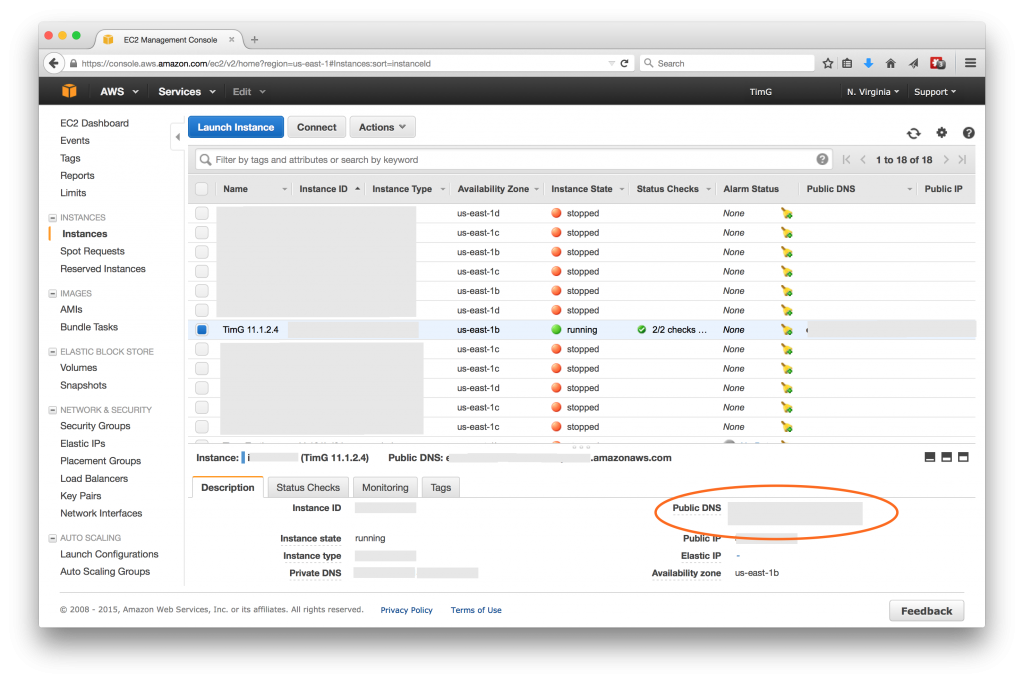
Eventually, we see a green check indicating that all is well. Your EPM instance is up and running in an Amazon datacenter somewhere! At this point, it is time to connect to the instance. Select it in the list to display a number of instance properties in the lower pane.
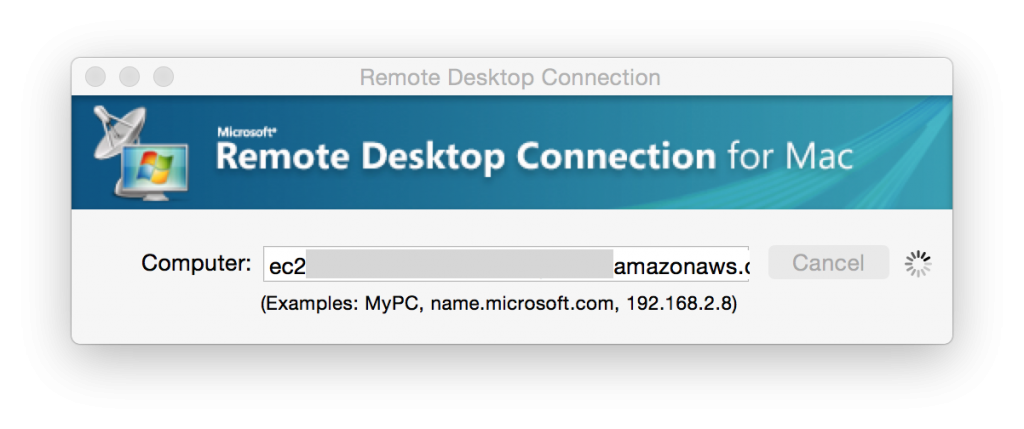
Enter the public DNS and hit ‘Connect’. Note that if you see a message at this point indicating a problem connecting to the server, the first thing to check is that your security group is set up correctly for your current IP address.
For some reason, I always receive a certificate error at this point. I am loath to advise ignoring a certificate error, but I believe the reason is that the AWS public DNS does not match the server’s ‘internal’ name of ‘metavero’. I’d be interested to hear from anyone who knows better in the comments.
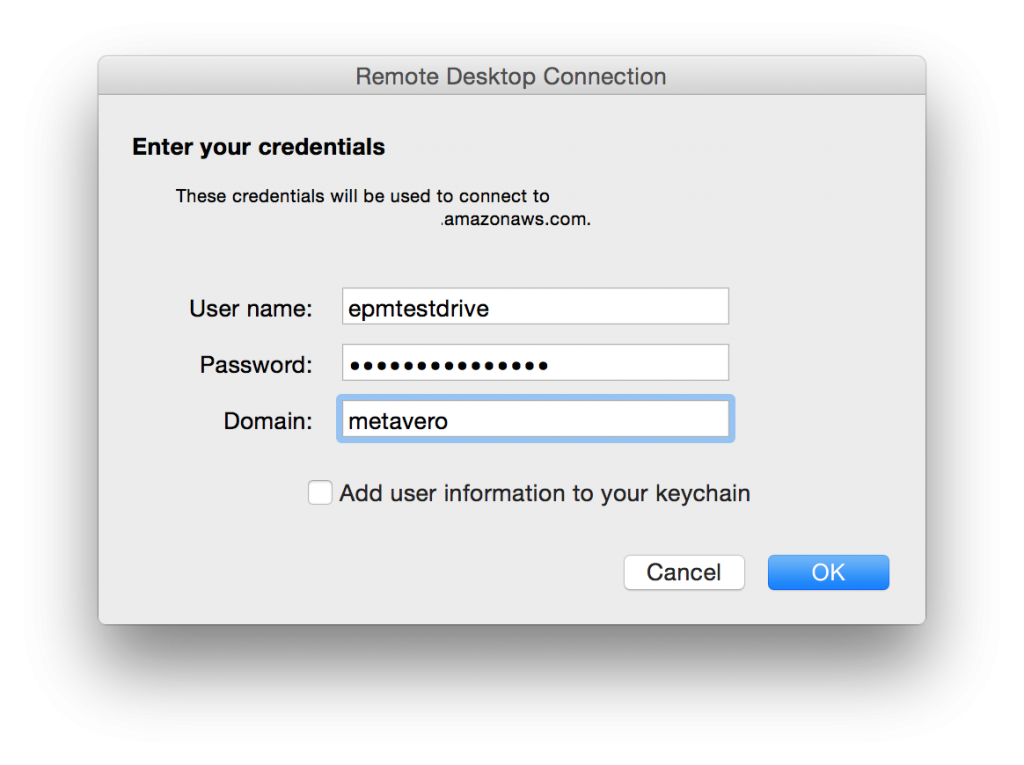
Log in with the credentials given in John’s blog post, entering ‘metavero’ as the domain.
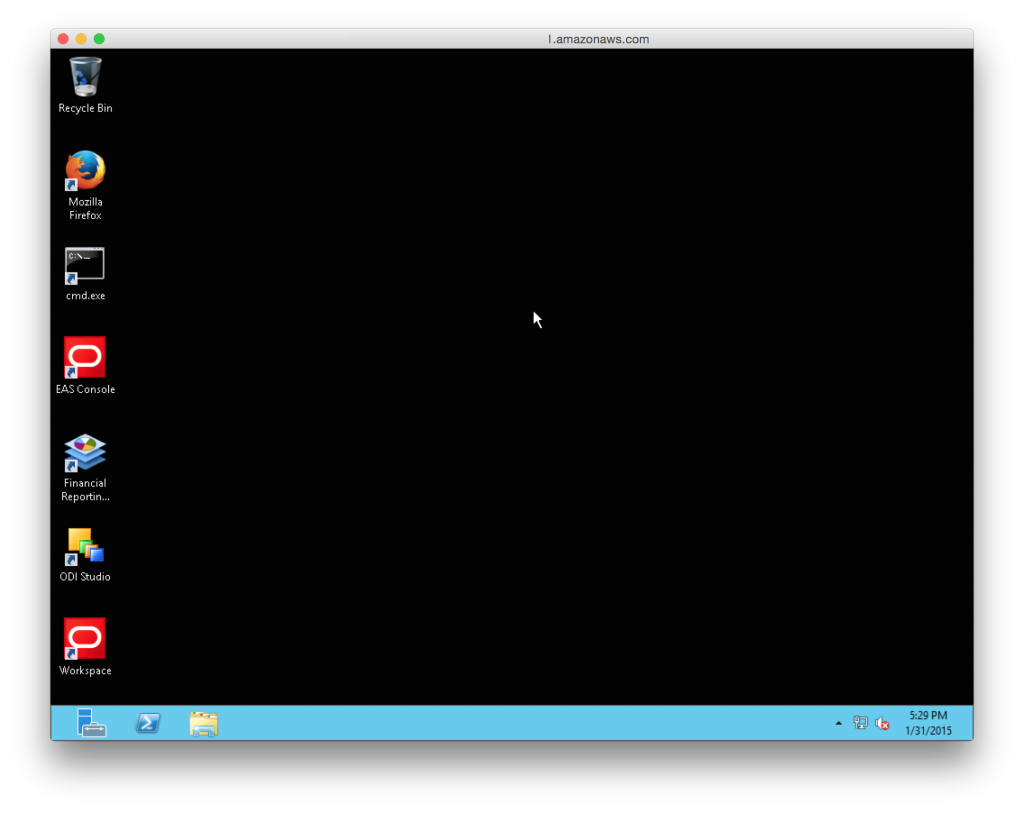
Hurrah! Here we are in Windows 2012 Server. To confirm some basic functionality, double-click the EAS Console link. Click ‘Run’ on the normal first-time ‘Do you want to run this application?’ warning when starting EAS.
Log in to EAS with the EPM credentials taken from, yes, John’s blog post. And there you have it; a running, functional EPM instance! Or, a running, functional Essbase server at least, and everyone knows that Essbase is the most important part of the EPM stack. I have played around with Essbase and EAS in this instance and it seems fully functional; I know others have run Planning successfully. Most of the tools and applications are installed and I’m entirely confident of John’s ability to install and configure them correctly.
You must remember to stop the instance when you are not using it, or charges will continue to accrue – you must also delete the instance and associated storage volumes when you are done with it (storage attracts Amazon fees even with the instance is not running).












This is really fantastic, Tim! Thank you for taking the time to write this up and share it with the world! 🙂
Apologise I could not find the latest AMI is the latest AMI ID : ami-44e3a32c ??? Thks David
My fault I used the wrong region deerrrr ! we have it & thanks so much to John & all
Glad that it was helpful, David! Feel free to get in touch if you run in to any problems (or find steps that aren’t as clearly documented as they could be).
Hello David! Sorry to disturb you, I can’t find either ami-44e3a32c image. What is that you did wrong? thanks. daniela
I just did an install of 11.1.2.4 for my desktop. From what I can see there is no thick client for EAS. I haven’t got the chance to look up the AMI yet but can someone tell me what is the EAS link pointing to?
Hello! Great post, unfortunately I can’t find image ami-44e3a32c on AWS. Is it still available? thanks. daniela
Yes, ami-44e3a32c is the latest and is still there (I spun one up a few days ago, and I just checked a moment ago).
You do have to make sure to search ‘Public Images’ (the default is ‘Owned by me’) and make sure your region is set to ‘US East’ / ‘N. Virginia’ for it to show up.
If you continue to have trouble finding it, could you post a link to a screenshot of the AWS AMI search you’re using?
Thanks for reading / commenting!
Thanks a lot for the answer! My mistake, I was on the wrong region. Changed to US East and found the instance.
I do have another issues I would very much appreciate some help. I created my instance, set as indicated a security group RDP – port 3389 – source 0.0.0.0/0 (I know, it’s the world and is dangerous but I just want to test that I can connect to the instance). I see my instance has a Public ID and no public DNS.
When I try to connect using the Repote Desktop I get the ‘remote desktop cannot connect to the remote computer ….’ message error. I even disabled the firewall, nothing, I just won’t connect.
Any ideas of what can be the cause and how I could solve it?
Thank you,
Daniela
Hi Daniela,
My instance comes up the same way, with a public IP but no public DNS. I then connect with RDP using the public IP.
In my security group I allow RDP, all TCP and HTTP inbound traffic from my own IP (only).
A couple of ideas…
1. Confirm that you have associated the security group with the instance.
2. Is it possible that you are behind a corporate (not desktop / local) firewall that blocks external RDP? I know some of my clients do this. Using e.g. a home internet connection might rule this out.
Good luck – let me know how it goes!
Hi Tim,
Thanks for the tips. I did as adviced, but no result.
I checked the security group: my instance has associated a security group called launch-wizard-2 and in this security group I allowed RDP, all TCP and HTTP inbound traffic from my own IP only. I disabled the firewall.
I tried from my home (with the firewall down) from 2 laptops, from work, I even had one fried try it from his work. Nothing. If I ping the public ID I get request timed out.
I’m out of ideas, don’t know what else to try.
Thank you,
Daniela
Hi Daniela – how frustrating. Do you know if this is a general issue with AWS (i.e., do you use other images successfully)?
I’ve asked John Booth to take a look at your comments too.
Regards,
Tim
Is this Still Available, I was not able to find it, I was under public images and U.S East?
Regards
Unfortunately, John recently decided to withdraw the AMI due to licensing concerns. I have updated the blog post to reflect this.